
Supply List
Art Supplies: Beginning Drawing Students
Kits are usually available, just ask.
Note: If you already have art supplies that are similar to the listed items, but are not exactly the same, please check with your instructor to find out if you may substitute them.
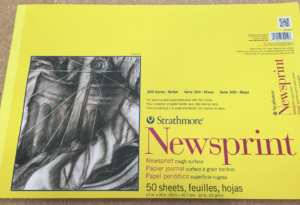
• A rough newsprint drawing paper pad, 14″ x 17″ is highly recommended. 12″ x 18″ or 18” x 24.” are ok. Please note: a “smooth” newsprint pad is not useful for the type of drawing taught in this class.)
• 1-2 bulldog clips big enough to clip onto your newsprint pad. (Clothespins or clips for potato chip bags are ok, too.)
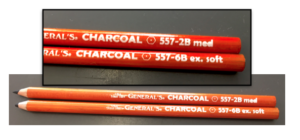
• Minimum of 2 charcoal drawing pencils, one extra soft, (or 6B), one medium (also called 2B or 4B, be sure the pencil is charcoal – not graphite.) You will use up the extra soft pencil quicker than the medium, so you may want to get two of the extra soft.
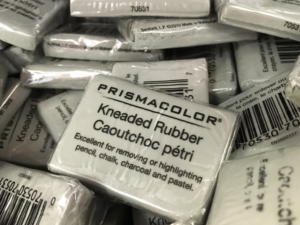
• kneaded eraser (gray)
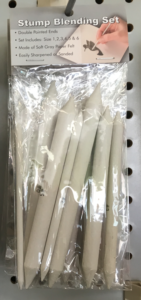
• At least 1 gray paper stump (Assorted sizes. If you only buy one, size 5 or 6 is preferable. It looks like a solid cylinder of light gray compressed paper with points on each end, about 5” long and between 1/2 and 3/4 inches in diameter. These are usually found in the drawing section of the art store. If one art store employee can’t help ask another one – often they don’t know what this is!
• 1 sandpaper block or (a piece of sandpaper)
• single edge razor blade (adult students only, for sharpening your pencils – each student receives a complimentary one at the first class, but you may want to get more later.)
Note: Some of the drawing supplies may come in a blister pack (usually with the pencils, eraser, sandpaper block, etc.)
Questions? Email me at: [email protected]
Optional Items:
*Container for pencils and tools. These pencils break when dropped so a protective case is a good idea. (When dropped, the charcoal can split down the entire length of the pencil, rendering it useless.)
*Weather-resistant portfolio to hold newsprint pad and pencils/tools.
*A Pink Pearl pencil eraser (eraser in the shape of a pencil. Sometimes hard to find, but may be available at larger art stores or large office supply stores, sometimes these come in blister packs of two. sometimes there are available at OVA.)
*Book, “Perspective” by Ernest Norling. HIGHLY recommended, but out of print. Used copies may be available at the studio. Published by Walter T Foster (or a version by Watson Guptill), very large format, flat, paperback book. It is not required, but it is a spectacularly informative book, primarily due to the wonderful illustrations that clearly explain this tricky subject, I have never seen a better presentation. It has been published with many different covers and in different sizes. The recommended version is the paperback that is about 15″ high and 10″ wide (nearly twice the size of a standard sheet of paper.) This size is recommended because the smaller versions don’t have the larger size illustrations. Out of print versions are often available at used bookstores online.
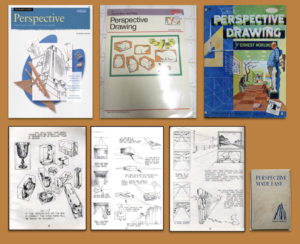
(L-R) Perspective by Ernest Norling, most recent cover. Middle: previous cover. Right: Original cover when this large format version was first published in the 1960’s. Bottom row, first three images show what the pages inside this book look like. Even though the covers change, the interior is the same in the large format, paperback version (although sometimes in a different order.) These diagrams are very valuable to the art student. Bottom right is the original book from 1939, great to have for the perspective enthusiast, but it doesn’t have all the fabulous images.
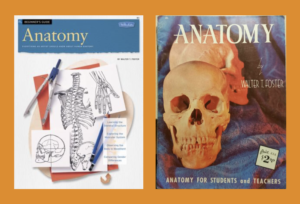
*For students interested in portrait/figure: “Anatomy” by Walter T Foster is HIGHLY recommended, if you only get one anatomy book, this is the one to have. The newer, reprinted version, shown at left, is missing a couple of the most important pages, plus they have reduced the size of the illustrations to fit more on fewer pages. Vintage copies, shown at right, are best and are sometimes available at the studio. ($2 was the price in 1968!)
Art Supplies: Beginning Painting Students
For your first painting preparation class (the class during which, or right after, you complete your charcoal drawing.)
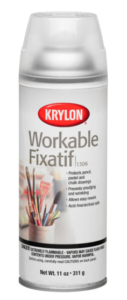
can spray fixative: matte, workable (available in class)
graphite transfer paper
(available by the sheet in class)
thin tracing paper
(available by the sheet in class)
A piece of cardboard (approx. 2” larger than drawing)
Clear plastic wrap such as handi-wrap, saran wrap (roll)
Tape (package tape, duct tape are best scotch tape is ok).
1 canvas panel or stretched canvas, the size of your drawing (may be available in class)
1 box lid (such as a banker box lid), slightly larger than your canvas, to carry the wet painting back and forth in.
GLASS PALETTE: There are several options.
1. An approx. 11″ x 14″ or 12” x 16” piece of plain glass obtainable at the hardware store, have them grind the edges. Heavier glass is better.
2. Alternatively, the glass from a picture frame (these can be found at the dollar stores) will work just fine, too! These are usually 8.5″ x 11″ or 8″ x 10″(Just be sure the glass is real glass, not plastic or Plexiglas.)
Use a tan paper grocery bag or grey or tan cardboard for backing the glass. (If the glass is thin, shirt cardboard is preferred over the paper.) Seal edges with clear packing tape or duct tape. (This can be done in class)
(Note: Students use palette boxes when painting in color (not for the value painting). Check with your teacher about this. If you plan to put your palette in a palette box, and you have the box first, you can have the glass cut to size. The glass can be the same size as the box. Have the hardware store cut off one corner of the glass, if desired, to make lifting the glass palette out of the box easier.)
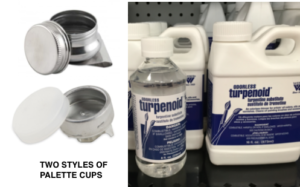
NON-SMELLING turpentine substitute such as Turpenoid, small size is ok
1 one pair of clip-on palette cups with lids, and/or small glass jar with lid, such as for pimientos, marinated artichokes, etc. for holding turpenoid
Paper towels (cheaper brands are better as they release the least amount of fibers)
BRUSHES: pure red sable only.
Note: Oil painting brushes have long handles. Short handles brushes are for watercolor, tole painting etc…shorter so they don’t poke your eyes out when you paint at a table. 😉 (Note: brush sizes are not standardized. A #4 brush by different manufacturers may be different sizes.)
1. Creative Mark ProStroke Red Sable Explorer Set #21502 (available at Jerry’s Artarama locally or via website. This set includes these sizes: 00 & 12 Round, 2 & 12 Bright, 8 Almond Filbert, 2 & 6 Pointed Filbert. It retails for about $80 but is much cheaper at Jerry’s, often nearly half off, or more if it’s a great sale.)
2. Recommended but optional: one larger flat brush, approx 14-16. Red sable preferred but badger hair or ox is ok for this.
IF YOU PREFER TO BUY BRUSHES SINGLY, OR IF YOU ALREADY HAVE SOME, THIS IS WHAT YOU NEED, SOME VARIATIONS ARE OK:
#10 or 12 flat (or filbert) sable oil brush (Optional #14 or 16 flat sable oil brush
# 4 or 6 flat (or filbert) sable oil brush
# 1 flat or round sable oil brush
# 8 or #10 round red sable oil brush
(Note: #2 or #4 red sable fan brush can be purchased now if desired, it will be required later .)
This is the minimum number of brushes needed to get started, expect to add a few brushes to your collection as you go along, based on your preferences. If cared for, red sable will last for many years, I have had most of mine for decades.
Note: the set of filberts at Jerry’s Artarama, item # 63875B, Pro Stroke Filbert Set (SRP $650.00 , Jerry’s price $259, is often on an even better sale. with discounts, etc. If you buy this set, the only other brushes you will need are the # 8 or #10 round, and the fan brush. This set should last for several decades, even if you use them a lot.
OIL PAINT: Professional grade paints are recommended. They are a littie pricier, but they also last longer because they have more “tinting strength.” However student grade paints are acceptable, and a mix of student and professional grade paints are fine also. As your instructor in class about possibilities. Student grades include Winsor and Newton’s “Winton” grade, or Grumbacher’s Pre-tested. Recommended brands include Winsor & Newton and Grumbacher, and also Weber-Permalba for the tube of white.
Water soluble oil paints are not appropriate.
Some sets may be a good deal if they have most of the colors recommended.
For your underpainting, you only need the first two colors listed in the list of paints further down on this page. They are:
1 tube white (either a studio tube of Titanium white, or a large tube of Weber Permalba White. White is the color which will be used up the quickest, so a large tube may be more economical..)
1 studio tube burnt umber
Palette knife (Size approx. 3”-4″, preferably FLAT palette knife (not trowel handle type) Palette knive preferencess are VERY PERSONAL. There are many at the studio which can be used in class, it is recommended that you try a couple out to determine which style you prefer before buying.
Optional: oil paint eraser (short taper)
OTHER OPTIONAL ITEMS:
A large box lid (such as the cardboard lid for ream of paper, or clean pizza box) to carry your wet painting in. (A box with a lid offers more protection: clean pizza boxes may be useful for transporting wet paintings and palettes. Ask for an extra box when yo pick up a pizza! Also a standard banker’s box can be cut down to a couple of inches in height.
A large flat plastic container that will fit in freezer, with glass cut to fit (cut corner off) for “paint saving” palette. (Used when painting in color not for value studies.)
Mahl stick (alternatively, a 1/2” or 5/8” diameter wood dowel, 36” long, available at crafts stores, also lumber and hardware stores. A couple are available in class.)
Art Supplies: Intermediate Painting Students
ADDITIONAL BRUSH: #4 or #2 red sable fan brush
ADDITIONAL Small bottle (with eyedropper) of oil of cloves (can be purchased at drug stores or from essential oil distributors such as doTerra or Young Living.) This is used to extend the life of the paint you save. A communal bottle is available for student use in class.
ADDITIONAL OIL PAINT/COLORS: (Studio tube size)
When possible, do not choose paints marked “hue.” (One exception is Cobalt Blue Hue, which is fine for still life painting and cheaper than the genuine Cobalt Blue – which is more essential for landscape painting.) For instance, choose permanent green light, not permanent green light hue. “Hues” are diluted color.
Note: cadmiums are usually the more expensive colors (but they also last longer!), look for sales or coupons. Earth colors are usually less expensive, and include: burnt umber, raw umber and yellow ochre.
1 tube white, either a studio tube of Titanium white, or a large tube of Weber Permalba White. White is the color which will be used up the quickest, so a large tube may be more economical. You will purchase this first for underpainting)
1 studio tube burnt umber (You will purchase this first for underpainting)
1 studio tube cadmium red light (not available in Winsor Newton professional grade, Winton is fine)
1 studio tube alizarin crimson
1 studio tube cadmium orange
1 studio tube cadmium yellow medium
1 studio tube permanent green light (if using green background, sometimes used for pear)
1 studio tube viridian (if using green background)
1 studio tube cobalt blue or cobalt blue hue, and/or ultramarine (if using blue background)
1 studio tube Winsor violet (available in professional grade, only needed if using purple background)
1 studio tube raw umber
1 studio tube yellow ochre
1 studio tube ivory black
Optional colors: pthalo blue, raw sienna, lt. red, burnt sienna
–